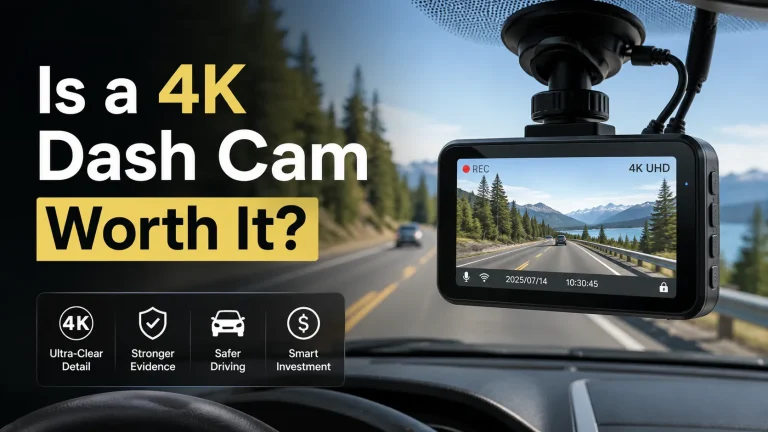
Where Not to Put a Dashcam: 8 Unsafe Mounting Spots

Do not put a dashcam where it blocks your road view, covers a factory safety camera, sits in an airbag zone, or gets hit by the mirror or sun visor. Also avoid dirty, damaged, heavily tinted, textured, or unwiped glass. A high spot near the rearview mirror is often better, but it must fit your vehicle and state rules.
Dashcam placement affects more than video quality. The wrong spot can reduce your view, distract you, weaken the mount, or block a vehicle sensor.
In this guide, I’ll explain where not to put a dashcam. You’ll also learn how to check a safer position before attaching the mount.
Avoid the driver’s direct sight line, factory camera zones, airbag paths, loose trim, and glass outside the wiper sweep. For many vehicles, a high position near the rearview mirror works well. Still, check the owner’s manual, camera view, cable path, and current state law first.
Why Dashcam Position Matters
A dashcam needs a clear view of the road. The driver needs an even clearer view.
A camera in the wrong place may hide a traffic light, pedestrian, cyclist, motorcycle, or nearby vehicle. This risk can be greater at junctions and during turns.
Placement also affects the recording. Rain, dirt, glare, tint, dashboard reflections, and mirror trim can hide useful details.
Modern cars may have cameras and sensors near the rearview mirror. These may support automatic emergency braking, lane assistance, traffic sign alerts, or automatic high beams. Learn more about related equipment in our car electronics guide.
Where Not to Put a Dashcam
1. In Your Direct Road View
Do not place the camera in the center of your normal sight line. Even a small camera can hide part of the road.
Sit in your usual driving position. Look through the full windshield and toward both front corners. The camera should not cover traffic signals, signs, people, or vehicles.
2. In Front of a Factory Camera
Many newer vehicles have a forward-facing camera near the rearview mirror. Do not place a dashcam, cable clip, sticker, or adhesive pad in front of it.
Toyota warns against attaching objects to the windshield area in front of certain forward cameras. The restricted area differs by vehicle, so use your own manual rather than copying another car’s setup. Review the Toyota forward-camera precautions as one example of manufacturer guidance. :contentReference[oaicite:0]{index=0}
Check: Look for a camera housing, sensor cover, black windshield area, or warning label near the mirror. Read the sections about driver assistance, windshield replacement, rain sensors, and automatic lights. Limitations: A safe position in one vehicle may block equipment in another.
3. Inside an Airbag Zone
Do not attach a camera or cable clip to an airbag cover. Avoid routing wire where an airbag may open.
Side-curtain airbags are often stored near the roof edge and A-pillars. Their exact position differs by vehicle.
NHTSA explains that airbags inflate very quickly. A device or cable in the deployment path may create a serious risk. Check the airbag diagrams in your owner’s manual before moving trim. Read the official NHTSA airbag safety guidance. :contentReference[oaicite:1]{index=1}
4. Where the Mirror Can Hit It
Your rearview mirror should move through its full range. The camera should not block or limit that movement.
Turn the mirror up, down, left, and right. Check the camera, mount, and cable at each position.
Repeated contact may loosen the adhesive or change the recording angle. It may also damage the power connector.
5. Where a Sun Visor Hits It
Lower both sun visors before choosing the final position. Turn each visor toward its side window as well.
A visor may hit a camera mounted high near the mirror. It can move the camera, pull the cable, or knock the device from its mount.
6. Outside the Wiper Sweep
A camera should look through glass that the windshield wipers can clear. An unwiped area may collect rain, ice, road salt, dust, or snow.
Dirty glass can hide plates, lanes, signals, and other details. Check the wiper sweep from outside the vehicle before mounting the camera.
7. On Weak or Damaged Surfaces
Do not mount a dashcam on cracked glass, peeling film, rough plastic, dusty glass, or a textured mirror housing.
Garmin states that dirt, film, temperature changes, and textured non-glass surfaces may weaken some dashcam mounts. Garmin also warns that a suction mount can damage certain aftermarket tint films. Review the Garmin mounting-surface guidance. :contentReference[oaicite:2]{index=2}
Ask the tint installer before placing adhesive on aftermarket film. The mount may pull, bubble, or mark the film during removal.
8. Where the Cable Hangs Loose
Do not let the power cable cross the windshield, steering column, pedals, shifter, or dashboard controls.
The wire should not hang near the driver’s hands or feet. It must also remain clear of moving seats, doors, hinges, and airbag zones.
Secure the cable before driving. Do not test a loose installation on the road.
Unsafe Spots and Better Choices
This table shows the main risk in each area. Use it as a quick first check.
| Unsafe Spot | Main Risk | Better Choice |
|---|---|---|
| Driver’s sight line | Blocks the road view | Higher, outside the main view |
| Factory camera zone | Blocks a safety sensor | Outside the marked area |
| Airbag cover | May affect deployment | Manual-approved cable path |
| Unwiped glass | Poor wet-weather footage | Inside the wiper sweep |
| Textured surface | Mount may fall | Clean, smooth glass |
| Visor contact area | Camera may move | Clear of both visors |
How to Find a Safer Position
A high spot near the rearview mirror is often a useful starting point. It may keep the camera outside your main view while giving the lens a wide road view.
It is not safe in every vehicle. The mirror area may contain a factory camera, rain sensor, antenna, tint strip, or large plastic cover.
Garmin recommends powering the camera and checking its field of view before choosing the final mounting spot. This helps you find hidden mirror trim, dashboard glare, and poor camera angles. :contentReference[oaicite:3]{index=3}
Find the airbag, sensor, camera, windshield, and driver-assistance sections.
Confirm where windshield-mounted devices may be placed.
Use live view to check the road, hood, horizon, and mirror trim.
Move the mirror and both sun visors through their full range.
Keep it clear of airbags, controls, pedals, seats, and moving trim.
Check daytime and nighttime clips before finalizing the position.
Moderate: A plug-in camera may be simple to mount. Safe cable routing takes more care. Hardwiring can be harder because it involves the fuse box, trim, and parking-mode power.
Check These Vehicle Features
Your car may have equipment that changes the best mounting spot. Check these parts before using adhesive.
| Vehicle Feature | What to Check | Why It Matters |
|---|---|---|
| Forward camera | Required clear zone | Supports driver-assistance features |
| Rain sensor | Sensor and cover area | May control the wipers |
| Curtain airbag | A-pillar and roof edge | Changes the cable route |
| Heated windshield | Approved mounting areas | May affect the mount |
| Mirror housing | Lens clearance | May block the video |
| Aftermarket tint | Film maker’s advice | Adhesive may cause damage |
Do State Laws Affect Placement?
Yes. Windshield-obstruction and device-mounting rules are not the same across the United States.
Some states name permitted windshield areas. Other states focus on whether an object blocks the driver’s clear view.
California Vehicle Code Section 26708 bars objects that obstruct or reduce the driver’s clear view. It also lists limited exceptions for some devices and qualifying video event recorders. Read the current California windshield law for the full terms. :contentReference[oaicite:4]{index=4}
Do not rely on a general online map alone. Check a state legislature, motor vehicle agency, or law enforcement source.
Before You Install
- Check the vehicle owner’s manual.
- Find all windshield cameras and sensors.
- Locate the airbag deployment areas.
- Confirm the camera does not block your view.
- Keep the lens inside the wiper sweep.
- Move the mirror and both sun visors.
- Plan the full cable path.
- Check current state law.
- Clean and dry the mounting glass.
- Review test footage before final mounting.
Dashcam Placement Do’s and Don’ts
- Test the live view while parked.
- Keep factory sensors clear.
- Use a smooth, clean surface.
- Secure every part of the cable.
- Check footage after installation.
- Block your main road view.
- Cover an ADAS camera.
- Cross an airbag deployment path.
- Let the wire hang near pedals.
- Adjust the camera while driving.
Our safety gear guide covers more equipment that must be stored or installed without blocking controls, airbags, or driver movement.
When to Use a Professional Installer
Professional help may be safer when you cannot find the airbags or factory sensors. It may also help with hardwiring and rear-camera cables.
Consider an installer when:
- The wire must pass through an A-pillar.
- The camera needs fuse-box power.
- The vehicle has several windshield sensors.
- The rear cable passes through a liftgate.
- You cannot find a clear legal mounting spot.
- The trim does not release easily.
Do not remove trim by force. Stop when you find an airbag, damaged wire, unknown connector, or unsafe cable route.
- Best for: A high, stable position that keeps the road, sensors, mirror, and visors clear.
- Think twice if: The mount blocks your view or the cable crosses an airbag zone.
- Next step: Hold the powered camera in place and check every nearby part before using adhesive.
Frequently Asked Questions
Avoid the middle if the camera blocks any part of your normal road view. State mounting rules may also limit where a device can sit. A higher spot near the mirror may work better when it stays clear of factory sensors.
Behind or beside the mirror is often a useful starting point. It may keep the camera outside your main sight line. Make sure the mirror does not block the lens and the dashcam does not cover a factory camera or rain sensor.
Yes. A camera, adhesive pad, cable, or clip may block a windshield-mounted sensor. Check the driver-assistance section of your vehicle manual. Keep the full factory camera and sensor area clear.
Not always. Many vehicles have curtain airbags behind A-pillar trim. A poorly routed wire may cross the deployment path. Check the airbag diagram and use a trained installer when the safe route is unclear.
It depends on the tint and mount. Adhesive or suction mounts may pull, bubble, or mark some aftermarket films. Dark tint may also reduce night video quality. Ask the tint maker or installer before attaching the mount.
The lens should normally look through glass that the wipers keep clear. This helps during rain, snow, and road spray. The camera must still remain outside your main road view and comply with state rules.
No. Windshield and device rules vary by state. Some laws list permitted areas, while others focus on clear driver vision. Check a current state legislature or motor vehicle agency source before installation.
Conclusion
Do not put a dashcam where it blocks your road view, factory sensors, mirror, sun visor, or airbag path. Avoid loose cables, weak surfaces, and glass the wipers cannot clear.
A high spot near the rearview mirror is often practical, but it is not a universal answer. Check your vehicle manual and current state law first.
Before mounting, power the camera and review its live view. Move the mirror and visors, inspect the wire path, and test the footage while parked.
Article instructions supplied by the user: