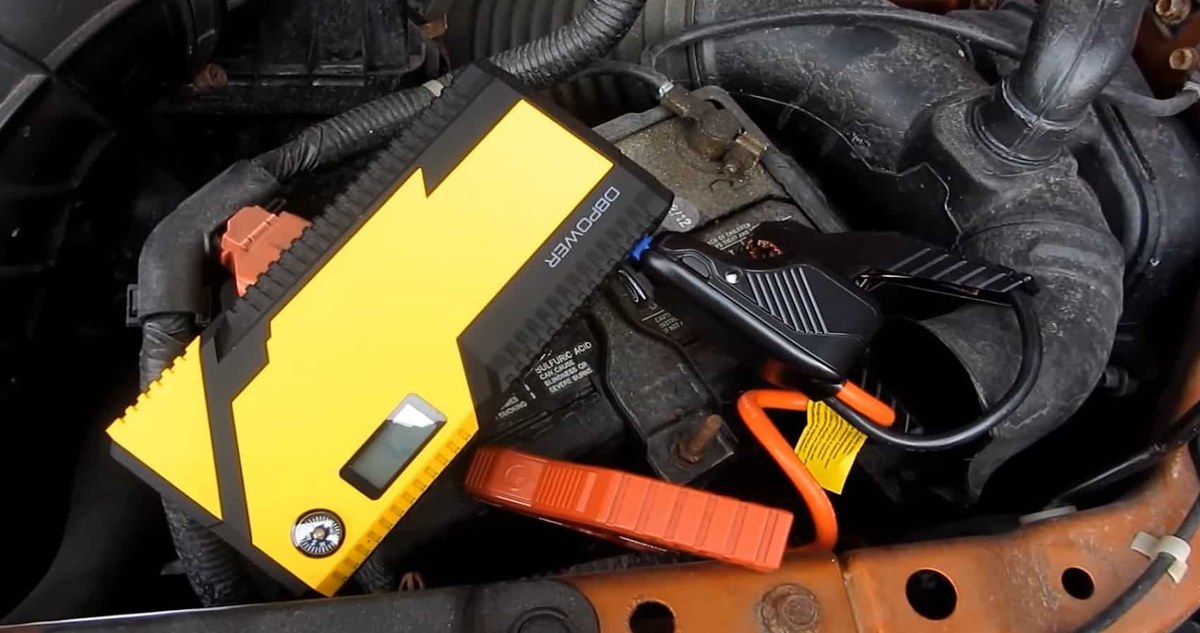
A portable jump starter that shuts off is usually protecting you from a bad connection, reversed clamps, or a battery too dead to detect. Fix the connection, recharge the unit, or use manual override only when you have confirmed polarity.
If your portable jump starter keeps shutting off the moment you connect it or mid-crank, the unit’s safety circuit is almost certainly doing its job — protecting you, the vehicle, and itself from an unsafe electrical condition. The fix usually comes down to one of a handful of causes, from a battery too dead to detect to corroded clamps, and this guide walks you through each one in plain English.
Key Takeaways
Safety first: The shut-off is the unit’s protection circuit working — never bypass it without visually.
Main cause: A vehicle battery below the unit’s detection threshold is the most common reason a.
Check connections: Corroded terminals, loose clamps, and cold lithium cells cause intermittent shut-offs that cleaning and.
Match the power: Confirm your unit’s cranking amps suit your engine size, fuel type, and 12V or.
Maintain it: Recharge the jump starter every few months and store it at room temperature to.
Why Your Portable Jump Starter Keeps Shutting Off (Answer First)
The Safety Circuit Is Working as Intended — Here’s What Triggers It
Modern lithium jump starters are “smart” devices. Before they deliver power, an internal controller checks for reverse polarity, short circuits, over-current draw, and a minimum battery voltage. If anything looks wrong, the unit cuts output instantly. That shut-off you’re seeing is the safety relay refusing to close because it detected — or could not verify — a safe connection.
This is a feature, not a defect. A jump starter that blindly sent power into a reversed clamp could cause sparks, arcing, or damage to the vehicle’s electronics. The trade-off is that smart units can be more sensitive than older, simpler booster packs, and that sensitivity produces confusing behavior when the vehicle battery is in poor condition.
The #1 Cause: A Vehicle Battery Too Depleted for the Jump Starter to Detect
Most lithium jump starters require the vehicle battery to register a minimum voltage before they will engage. That threshold varies by brand and model, but it is typically in the range of a couple of volts. A battery that has sat for months, been drained by a parasitic draw, or has an internal short can fall below that level. The jump starter then behaves as if no battery is connected and shuts off.
If your headlights are dead, the dashboard is dark, and the door chime is silent, you are dealing with a deeply discharged battery — the exact scenario that causes this shut-off. For a closer look at why a dead battery behaves this way, see our guide on jump starting a dead battery pack.
7 Reasons Your Jump Starter Shuts Off Mid-Crank
A jump starter connected to a car battery during a jump-start attempt.
Corroded or Loose Clamps and Dirty Battery Terminals
Jump starter clamps need a clean, solid connection to the battery terminals. Corrosion, grease, or a loose clamp creates resistance and intermittent contact. The unit may detect an open circuit and cut power, or it may try to deliver current through a poor path and trip its protection. Scrub the terminals with a wire brush, make sure the clamps grip the metal posts — not the cable or insulation — and wiggle-test the connection before cranking.
Voltage Below the Jump Starter’s Minimum Detection Threshold
As covered above, a battery that has dropped below the unit’s detection threshold will cause an immediate shut-off. This is the most common reason a jump starter “does nothing” on a truly dead battery. Many units display a specific error code for this condition, so check your manual’s troubleshooting table before assuming the unit is broken.
Low Internal Charge on the Jump Starter Itself
A jump starter with a nearly empty internal battery can still light its LED indicators but lack the stored energy to crank an engine. When you press the start button, the voltage sags under load, and the unit’s own battery management system shuts off output to protect the cells. Check the charge-level indicator before connecting. If it is below half, recharge the unit first.
Cold Weather and Thermal Protection Shut-Down
Lithium-ion cells lose capacity and deliver less current in freezing temperatures. Many units also have internal temperature sensors that cut output if the cells are too cold or too hot. A jump starter stored in a cold trunk overnight may shut off immediately on a cold morning. Warming the unit inside the vehicle cabin for 10–15 minutes before use often resolves this. For more detail, read our guide on cold-weather jump starter performance.
Sulfated Battery or an Internal Short in the Vehicle Battery
A battery that has been deeply discharged for a long time develops sulfate crystals on its plates. This increases internal resistance, so the battery may show 12 volts at rest but collapse to near zero the moment the starter draws current. An internal short produces a similar effect. The jump starter sees a load that behaves like a short circuit and shuts off. In both cases, the battery is the problem — not the jump starter.
Over-Current Protection From a Seized or Failing Starter Motor
If the starter motor is failing, dragging, or seized, it can draw far more current than the jump starter is rated to deliver. The unit’s over-current protection trips, cutting power mid-crank. A rapid clicking sound, a single sluggish rotation, or a loud grinding noise before the shut-off points to the starter rather than the battery. This is the unit protecting itself from an electrical overload.
No Manual Override (or Override Not Activated)
Many smart jump starters include a manual override or “bypass” mode that forces the unit to output power even when the vehicle battery is too low to detect. If your unit has this feature, it is usually activated by holding a button for several seconds. If your unit lacks override, it simply cannot jump a completely dead battery — a limitation worth knowing before you rely on it in an emergency.
How to Diagnose the Exact Cause (Without Guessing)
Reading LED Codes and Beep Patterns on Your Unit
Most jump starters communicate errors through colored LEDs, blinking patterns, or beeps. A solid green light means ready; a flashing red light or rapid beeping usually indicates reverse polarity, low voltage, or a short circuit. These codes are specific to each manufacturer, so the fastest diagnosis is to open the manual and match the pattern you see to its error table.
Using a Multimeter to Check Battery Voltage Safely
A digital multimeter removes the guesswork. Set it to DC volts, connect the red probe to the positive terminal and the black probe to the negative terminal, and read the voltage. A healthy, fully charged battery reads about 12.6 volts. At 12.4 volts it is roughly 75 percent charged, and below 12.0 volts it is significantly discharged. A battery that reads 12 volts but drops below 9 or 10 volts while someone cranks the engine is failing under load.
Diagnostic Limits: What a Jump Starter Can’t Tell You
A jump starter is a power source, not a diagnostic tool. It cannot tell you whether your alternator is charging, whether the battery has a dead cell, or whether a parasitic drain is killing the battery overnight. If the jump starter works fine on another vehicle but shuts off on yours, the problem is almost certainly in the vehicle’s battery, cables, or starter circuit — not the jump starter.
How to Jump Start Correctly So the Unit Stops Shutting Off<
Correctly connecting the jumper cables to the battery terminals prevents the portable unit from
/h2>
Clamp Order, Placement, and Making Solid Contact
Correct connection order matters. Follow the sequence below, and always confirm the clamps are gripping bare metal terminals with no corrosion between the clamp and the post.
1
Position both vehicles safely
Park on level ground, turn off the ignition, and engage the parking brake. Keep the jump starter away from moving engine parts.
2
Connect the red clamp to the positive terminal
Attach the red clamp to the battery’s positive post. Make sure it is fully seated and does not touch any metal bodywork.
3
Connect the black clamp to the negative terminal or engine ground
Follow your jump starter’s manual — some units specify the negative battery post, others recommend an unpainted engine ground bolt. Confirm the clamp is secure.
4
Start the vehicle within the recommended window
Most units require cranking within 30 seconds of connection. If the engine does not start quickly, stop and investigate rather than repeatedly cranking.
5
Disconnect in reverse order
Remove the black clamp first, then the red clamp, and store the jump starter in a temperature-controlled location.
When to Use Manual Override — and When It’s Unsafe
Manual override is designed for one situation: a vehicle battery so deeply discharged that the smart circuit cannot detect it. When you activate override, the unit outputs power without verifying the connection. That means you must visually confirm the clamps are on the correct terminals before pressing the button. If you suspect the clamps may be reversed, do not use override.
When to Stop: Warning Signs of Damage or Danger
If the jump starter feels hot, emits a burning smell, makes a hissing sound, or shows a swollen case, disconnect it immediately and move it away from the vehicle. The same applies if the vehicle battery is bulging, leaking, or excessively hot. These are signs of internal failure, and no jump start is worth the risk of fire or injury. Stop, allow everything to cool, and seek professional help.
Do
Clean battery terminals with a wire brush before clamping
Confirm the jump starter has at least a half charge before use
Follow the exact clamp order in your unit’s manual
Recharge the jump starter after every use
Don’t
Use manual override unless you have visually confirmed polarity
Jump a battery that is swollen, leaking, or cracked
Store a jump starter in a hot trunk or fully discharged state
Keep cranking after repeated shut-offs without diagnosing the cause
Compatibility and Power: Is Your Jump Starter Even Big Enough?
12V vs. 24V Systems and Reverse-Polarity Protection
Nearly all cars, SUVs, and light trucks use a 12-volt electrical system. Medium-duty trucks, buses, and some military or industrial vehicles use 24 volts. A jump starter designed for 12V may shut off immediately — or sustain damage — when connected to a 24V system. Check your vehicle’s owner’s manual and the jump starter’s specifications before connecting. Reverse-polarity protection will stop a reversed connection, but it will not make a 12V unit compatible with a 24V vehicle.
Vehicle Compatibility
Check: Verify your vehicle’s system voltage (12V vs. 24V), engine size, fuel type, and battery terminal layout before choosing a jump starter. Limitations: A unit rated for a small four-cylinder may not deliver enough cranking current for a large V8 or diesel engine.
Peak Amps vs. Cranking Amps: Matching the Unit to Your Engine
“Peak amps” is a marketing number that describes the absolute maximum the unit can output for a fraction of a second. What actually matters is sustained cranking current, sometimes listed as cranking amps or cold cranking amps. A four-cylinder gasoline engine typically needs less current than a V8, and a diesel needs more than a gasoline engine of similar size. If your unit is undersized, it will trip over-current protection mid-crank and shut off. For a fuller breakdown of sizing, read our guide on how to choose a jump starter.
Maintenance and Ownership: Keeping Your Jump Starter Reliable
Charging, Storage, and Temperature Limits That Prevent Shut-Off
Most lithium jump starters slowly self-discharge when stored. If you leave one in a glovebox for months without recharging, the internal battery can drop to a level where it cannot crank an engine — or where the battery management system refuses to output at all. Check your manual for the recommended recharge interval; many manufacturers suggest topping up the unit every three to six months. Store it at room temperature rather than in a hot trunk, where heat accelerates battery degradation. For a comparison of battery chemistries and their maintenance needs, see our article on lithium vs. lead-acid jump starters.
When Replacement Costs Less Than Repeated Shut-Offs
If your jump starter is several years old, will not hold a charge, or shuts off even on a healthy battery, the internal cells may be worn out. Lithium cells degrade with age and charge cycles, and there is no user-serviceable fix for a degraded pack. Compare the cost of a new unit against the frustration and risk of relying on a failing one during a real emergency. In many cases, a mid-range replacement delivers more cranking power and better safety features than an aging unit that cannot be trusted.
Your Next Steps: What to Do When It Still Won’t Start
It’s Probably the Vehicle Battery, Not the Jump Starter
If the jump starter works correctly on another vehicle — or if the unit’s error code points to low battery voltage — the vehicle battery is the likely culprit. Have the battery load-tested at an auto parts store or by a mechanic. A battery can read 12 volts at rest and still fail under the load of a starter motor. Replacing an old or sulfated battery often solves the problem permanently.
When to Call a Professional or Replace the Battery
Call a professional if you see a swollen or leaking battery, if the engine will not turn over even with a known-good jump starter, or if you smell burning electronics. These situations point to a battery, starter, or wiring fault that a jump starter cannot fix. A professional load test and electrical inspection will tell you whether the battery, alternator, or starter needs attention — and will save you from repeatedly fighting a shut-off jump starter.
Final Verdict
Best for: Most drivers dealing with shut-offs on a weak but not completely dead battery — the fix is usually cleaning connections, warming the unit, or recharging it.
Think twice if: Your vehicle battery is deeply discharged, sulfated, or failing; no jump starter can fix a battery that needs replacement.
Next step: Check your jump starter’s manual for error codes, measure the vehicle battery voltage with a multimeter, and have the battery load-tested if the problem persists.
Frequently Asked Questions
The safety circuit is working as intended. Smart jump starters shut off when they detect reverse polarity, an over-current draw, a short circuit, or a vehicle battery voltage too low for the unit to verify a safe connection.
Only if the unit has a manual override mode. Most smart jump starters require the vehicle battery to register a minimum voltage before they will output power. A battery below that threshold must be charged with a battery charger or jumped using the override function.
This usually means the starter motor is drawing more current than the jump starter can deliver, or the vehicle battery is collapsing under load due to sulfation or an internal short. Over-current protection trips and cuts output to protect the unit.
Manual override is safe only when you have visually confirmed the clamps are on the correct terminals. It bypasses the safety circuit, so reversed clamps can cause sparks, arcing, and damage to the vehicle or the jump starter.
Most manufacturers recommend recharging every three to six months because lithium cells self-discharge slowly over time. Check your unit’s manual for the exact interval and store it at room temperature rather than in a hot trunk.
Have the vehicle battery load-tested and check the starter and cables. If the jump starter works on another vehicle but not yours, the problem is in the vehicle’s battery or starting circuit, not the jump starter.
Hi, I'm Ethan Carter, and I've spent over a decade testing automotive electronics, dash cams, and interior accessories. I created TopBestCar.com to help car owners cut through marketing hype and find gear that actually performs for their exact make and model — backed by hands-on testing, spec comparisons, and real owner feedback.