Warm the jump starter indoors for 15 to 30 minutes and check the vehicle battery’s resting voltage before blaming the unit. Cold slows lithium-ion chemistry, so a fully charged jump starter can read low until it reaches room temperature.
If your portable jump starter not working in cold weather has you standing over an open hood in a freezing driveway, the problem is often easier to fix than you think. Cold changes how both the jump starter and the car battery deliver power, and the solution usually comes down to warming the unit, checking the vehicle battery, and following the right connection sequence. This guide explains what happens inside the battery at low temperatures, how to troubleshoot safely, and when the unit is truly beyond help.
Key Takeaways
Warm first: Bring a lithium jump starter indoors for 15 to 30 minutes before use in.
Check the vehicle battery: A healthy 12V battery reads about 12.6 volts at rest; below 12.4 indicates a.
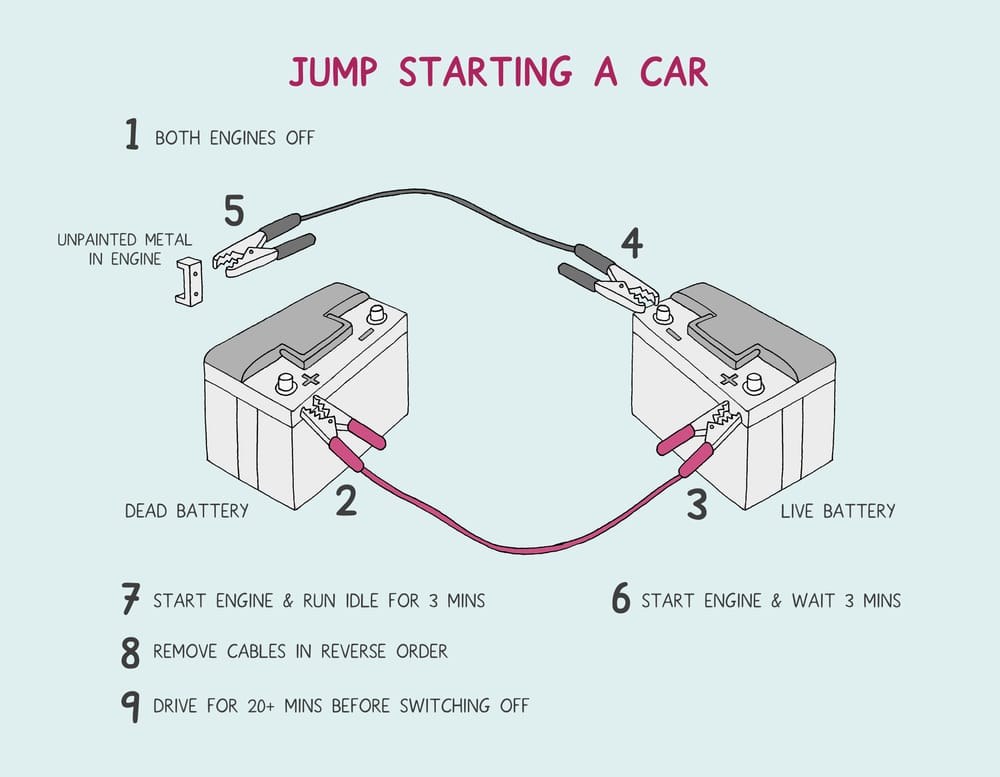
Follow connection order: Connect positive first, then negative to a grounded metal point, and reverse the order.
Respect cranking limits: Crank in short bursts with rest periods, and stop after two or three failed.
Replace when unsafe: Swelling, hissing, or heat means the lithium pack must be replaced, not recharged.
Why Your Portable Jump Starter Fails in Freezing Weather
The Short Answer: Warm the Unit and Check the Vehicle Battery First
The short answer is that cold weather creates a double problem. The jump starter’s lithium-ion cells lose available power as temperatures drop, while the vehicle battery also delivers less cranking current and the engine itself is harder to turn over because the oil is thicker. Before replacing anything, bring the jump starter indoors to warm up for 15 to 30 minutes, then check the vehicle battery’s resting voltage. In many cases, that simple sequence gets the engine started without any new parts.
Cold Weather Affects Both the Jump Starter and the Car Battery
It is easy to blame the jump starter when a car will not start in January, but the vehicle battery is often the weaker link. A battery that was already marginal in warm weather can drop below the voltage needed to crank a cold engine. Meanwhile, the jump starter itself is also operating below its rated output. The result is that a unit that works flawlessly in July can seem completely dead in February, even though nothing is actually broken.
Cold Weather Battery Science: Why Lithium-Ion Underperforms at 32°F and Below
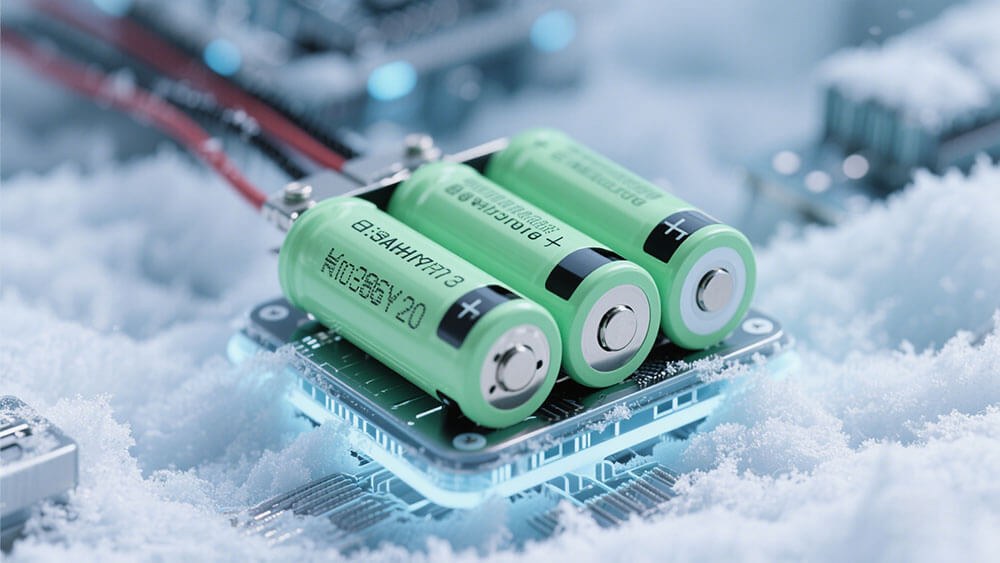
Lithium-ion batteries lose capacity and output power at freezing temperatures.
How Temperature Cuts Capacity, Crank Amps, and Delivered Voltage
Lithium-ion batteries rely on chemical reactions to release stored energy. Cold temperatures slow those reactions, which raises internal resistance and reduces the amount of current the battery can deliver in a short burst — exactly what a jump start requires. That same chemistry explains why lithium and lead-acid jump starters behave differently in winter: lead-acid units are heavier and less affected by the cold, while lithium units are lighter but more temperature-sensitive.
The exact performance drop varies by cell chemistry, manufacturer, and how cold it actually is. What matters for the driver is the practical result: a jump starter rated for a certain number of peak amps may deliver noticeably less at 32°F, and even less at 0°F. The colder it gets, the more important it is to start with a fully charged unit and warm it before use.
Why a “Fully Charged” Jump Starter Can Still Read Low in the Cold
Most jump starters use a battery management system, or BMS, that monitors voltage and temperature. In cold weather, the BMS may read a lower voltage and refuse to deliver power even when the unit showed a full charge the night before. This is a protection feature, not a defect. The unit is trying to avoid over-discharge and internal damage.
Before You Blame the Jump Starter: Check the Vehicle’s Battery First
Voltage Checks: What a Healthy Battery Should Read at Rest
A healthy 12-volt lead-acid battery at rest should read roughly 12.6 volts. Readings below 12.4 volts indicate a partial discharge, and anything below 12.0 volts is deeply discharged. Temperature affects these readings, so check the battery after the vehicle has been sitting for several hours and follow the instructions on your multimeter or battery tester.
If the vehicle battery is deeply discharged, the jump starter has to supply far more energy than it would for a battery that is simply cold. That is why a jump pack can fail on a dead battery even when it works fine on a car with a relatively healthy but cold battery.
Signs of a Failing Battery That No Jump Starter Can Fix
Some battery problems are beyond what any jump starter can solve. Look for a swollen or bulging case, heavy corrosion on the terminals, a rotten-egg smell, or a battery that needs a jump more than once a week. A battery older than roughly three to five years may simply be at the end of its service life. In those cases, the right fix is replacement, not another jump attempt.
The Cold Weather Jump Start Fix: Step-by-Step Sequence<
Attaching portable jump starter clamps to a car battery during cold weather.
/h2>
Warm the Jump Starter Safely (Never Use Open Heat or Microwaves)
The safest way to warm a jump starter is to bring it inside and let it sit at room temperature for 15 to 30 minutes. Some manufacturers recommend longer in extreme cold. Never use a microwave, oven, hair dryer, heat gun, or open flame. Lithium-ion cells are sensitive to heat, and forcing the temperature up can damage the pack or create a fire hazard.
Safe Connection Order and Correct Clamp Placement
Once the unit is warm and the vehicle battery has been inspected, connect the clamps in the order specified by the jump starter’s manual. The most common sequence is to attach the red positive clamp to the positive battery terminal first, then attach the black negative clamp to a clean, unpainted metal ground point on the engine block or chassis rather than directly to the negative battery terminal. Many manuals include this detail because it reduces the risk of sparks near the battery.
After the clamps are secure, turn on the jump starter if the unit requires it, then attempt to start the vehicle. Remove the clamps in reverse order once the engine is running.
When to Stop: Cranking Limits, Rest Periods, and Diagnostic Limits
Cranking limits vary by unit, so follow the manual. A common guideline is to avoid cranking for more than about five or six seconds at a time, then wait at least a minute before trying again. If the engine does not start after two or three attempts, stop. Continued cranking drains the jump starter and stresses the vehicle’s starter motor. At that point, the problem is likely a dead battery, a faulty starter, or a fuel or ignition issue that requires diagnosis.
Do
Warm the jump starter indoors before use
Check the vehicle battery’s resting voltage first
Follow the manual’s connection order and cranking limits
Recharge the jump starter after every use
Don’t
Use open heat, microwaves, or ovens to warm the unit
Connect the negative clamp directly to the battery if the manual says otherwise
Crank repeatedly without rest periods
Assume a jump starter can fix a swollen or failing vehicle battery
Voltage and System Compatibility: Matching the Jump Starter to Your Vehicle
12V vs. 24V Systems and Gas vs. Diesel Crank Requirements
Most passenger cars, trucks, and SUVs in the United States use a 12-volt electrical system. Heavy-duty commercial trucks and some industrial vehicles use 24 volts. Connecting a 12-volt jump starter to a 24-volt system can damage both the unit and the vehicle, so verify the system voltage before connecting anything.
Engine type also matters. Diesel engines have higher compression and typically need more cranking current than gasoline engines of similar size. A compact jump starter that easily starts a four-cylinder gas engine may struggle with a diesel pickup, especially in cold weather.
Vehicle Compatibility
Check: Verify your vehicle’s system voltage (12V or 24V), engine type (gas or diesel), and the jump starter’s rated capacity before purchase. Limitations: Many compact lithium units are designed for gas engines up to a certain displacement; check the manual for diesel compatibility and cold-weather limits.
Why Peak Amps and Internal Protection Matter More Than Advertised Numbers
Peak amp ratings are often marketing figures that describe a very short burst, not sustained cranking power. What matters more in cold weather is the unit’s ability to deliver usable current over several seconds, plus the quality of its internal protection circuits. Reverse-polarity protection, over-current protection, and low-temperature cutoffs can prevent both vehicle damage and unit failure.
When comparing models, look for the sustained output rating and the manufacturer’s stated engine-size range rather than the largest number printed on the box. Our guide to choosing a jump starter explains how to match those ratings to your vehicle.
Cold Weather Maintenance: Keeping Your Jump Starter Winter-Ready
Storage Location, Charge Levels, and Built-In Battery Protection
Where you store the jump starter matters as much as how often you use it. Keeping the unit in the passenger cabin rather than the trunk protects it from extreme cold, which also extends the life of its internal cells. If the unit must stay in the vehicle, try to bring it inside overnight when temperatures are expected to drop well below freezing.
For long-term storage, many manufacturers recommend keeping the internal battery at a partial charge rather than fully charged or fully depleted. Check the manual for the exact recommendation, and recharge the unit every few months even if you have not used it. Leaving a jump starter plugged in continuously can stress the internal battery, though most modern units include protection circuitry to limit the risk.
Seasonal Checks and When the Internal Cell Needs Replacement
A lithium-ion jump starter is not a lifetime product. Most units have a service life of several years before the internal cell loses enough capacity to be unreliable. If the unit takes noticeably longer to charge, shows a lower state of charge after the same charging routine, or fails to jump a vehicle it started easily the previous winter, the cell is likely degrading. At that point, replacement is the practical choice.
Safety Limits: When the Unit Is Beyond Help and Must Be Replaced
Warning Signs of a Damaged or Swollen Lithium-Ion Pack
Swelling, deformation, hissing, unusual odors, or excessive heat during charging are serious warning signs. A swollen lithium-ion pack can fail violently and should not be used or charged. If you notice any of these signs, stop using the unit, place it in a safe location away from flammable materials, and contact your local waste authority or the manufacturer for proper disposal guidance.
Ownership Cost: Repair vs. Replace vs. Upgrade
Most portable jump starters are sealed units, so internal battery replacement is rarely practical. When the cell degrades, the realistic options are replacement or an upgrade to a model with better cold-weather performance. Prices vary widely by brand, capacity, and retailer, so compare current listings rather than relying on outdated price assumptions. A quality unit is an investment in winter reliability, and the cost of replacing a worn-out jump starter is usually far less than the cost of a tow or a missed commitment.
Next Steps: Alternatives and Upgrades for Reliable Winter Starts
Battery Maintainers and Smart Chargers for Long Cold Stints
If the vehicle sits for days or weeks in freezing weather, a battery maintainer can keep the vehicle battery topped up and reduce the need for jump starts altogether. A maintainer is not the same as a jump starter: it supplies a small, steady charge to keep a healthy battery from draining, while a jump starter delivers a large burst to start an engine. For vehicles that are driven regularly, a jump starter remains the more practical emergency tool.
Choosing a Cold-Weather-Ready Jump Starter in 2026
When it is time to replace a cold-weather failure, look for a unit with a higher sustained output, quality clamps, clear status indicators, and protection features that match your vehicle’s needs. Pay attention to the manufacturer’s stated operating temperature range and engine-size compatibility rather than relying on peak amp numbers alone. Our roundup of the best jump starters for cold weather compares the models most likely to hold up when temperatures drop.
Final Verdict
Best for: Drivers who keep a jump starter in the car all year and need a reliable fix for cold-morning failures.
Think twice if: The vehicle battery is old, swollen, or deeply discharged — no jump starter can fix a battery that needs replacement.
Next step: Warm the unit indoors, verify the vehicle battery’s resting voltage, and follow the manual’s connection sequence before considering a replacement.
Frequently Asked Questions
Cold temperatures slow the chemical reactions inside lithium-ion cells, reducing available power and voltage. The vehicle battery also loses cranking power in the cold, so the jump starter has to work harder at the exact moment it can deliver less.
Most manufacturers recommend bringing the unit inside and letting it reach room temperature for roughly 15 to 30 minutes. Never use a microwave, oven, hair dryer, or open flame to speed up the process.
Check the resting voltage first — a healthy 12V lead-acid battery reads about 12.6 volts. If the battery is older than roughly three to five years, has a swollen case, or needs a jump more than once a week, replacement is usually the safer fix.
A jump starter with reverse-polarity and over-current protection is unlikely to damage a properly connected system. The bigger risk is incorrect clamp placement, so follow the unit’s manual and connect positive first, then negative to a grounded metal point.
Most modern units have built-in protection, but leaving one plugged in long-term can stress the internal battery. Store it indoors at a partial charge and check the level every few months instead.
Look for a unit with a higher capacity rating, low-temperature protection, quality clamps, and clear indicator lights. Verify that it matches your vehicle’s voltage and engine size before buying.
Hi, I'm Ethan Carter, and I've spent over a decade testing automotive electronics, dash cams, and interior accessories. I created TopBestCar.com to help car owners cut through marketing hype and find gear that actually performs for their exact make and model — backed by hands-on testing, spec comparisons, and real owner feedback.