Most night blur is caused by a dirty lens, weak reverse lights, or display settings — not a failed camera. Clean the lens and check your reverse bulbs first; if the image is still soft, compare replacement cameras using low-lux, sensor size, and WDR specs.
A backup camera blurry at night is one of the most frustrating problems for US drivers, but the fix is often simpler than you think. In most cases, the cause is dirt, weak reverse lighting, or a display setting — not a dead camera.
Key Takeaways
Clean first: Dirt, wax, and road film cause most night blur — a microfiber wipe often.
Check lighting: Weak or burned-out reverse bulbs starve the camera of light and force grainy images.
Isolate the fault: Test the camera in daylight and switch display inputs to tell whether the camera.
Upgrade with purpose: Low-lux rating, larger sensor, and WDR support matter more than megapixel count for night.
Know when to stop: Internal fog or a cracked housing means replacement — repairs on sealed cameras rarely.
Why Backup Cameras Look Blurry at Night: The Real Causes
Night blur usually comes from a combination of three factors: a dirty lens, poor auto-exposure, and the physical limits of a small sensor. Identifying which one is at play saves you from replacing parts that were never broken.
The Three Main Culprits: Dirt, Exposure, and Sensor Limits
Dirt is the number one cause. Road film, water spots, and wax residue scatter light from your reverse lamps, turning a sharp image into a hazy glow. A lens that looks clean in daylight can still have an invisible oily film that blooms at night.
Exposure is second. Most factory cameras use auto-exposure that tries to balance bright areas and dark surroundings. When the scene is too uneven, the image washes out or darkens into a blur. That is a software decision, not a hardware failure.
Sensor limits come last. Small sensors capture less light and produce more digital noise after dark, which softens edges and reduces detail, especially on wide-angle views.
When Blurry Vision Becomes a Safety Risk (and What the Law Requires)
A backup camera is a driver aid, not a substitute for looking over your shoulder. When the image is so blurred that you cannot see a child, pet, curb, or parked car, it is no longer doing its job. Federal rules require new vehicles to include rear visibility technology, but that requirement applies at the factory — it does not keep a camera clear forever.
Most states do not issue tickets specifically for a blurry camera, but they do hold drivers responsible for unsafe reversing. A failed camera can contribute to a collision and create real liability, so treat it as a safety issue, not just an annoyance.
Five-Minute Fixes to Try Before Anything Else
Wiping the lens clean often restores clarity to a nighttime backup camera view.
Before you buy parts or pull panels, try these quick fixes. They cost nothing and resolve a surprising number of night-blur cases.
Cleaning the Lens the Right Way
Use a microfiber cloth with a small amount of lens cleaner or diluted isopropyl alcohol. Avoid paper towels, abrasive pads, and ammonia-based glass cleaners, which can damage the lens coating. Wipe in a circle, then dry with a clean section of the cloth. Also clean the housing and trim around the lens, since trapped dirt can migrate onto the glass while you drive.
Do
Use a soft microfiber cloth and lens-safe cleaner
Clean the housing and surrounding trim
Retest at night after cleaning
Don’t
Use ammonia-based cleaners on coated lenses
Scrub with paper towels or abrasive pads
Assume cleaning will fix a cracked or fogged lens
Checking Reverse Light Output and Lens Fog
Your reverse lamps are the camera’s main light source at night. If one bulb is burned out, dimmed, or covered by a dirty housing, the camera has less light to work with. Have someone shift into reverse while you check that both lights are bright and even.
Lens fog is different. If you see condensation inside the lens or a milky haze that will not wipe off, moisture has entered the sealed unit. That usually means replacement, because the fog returns even after it dries.
Is the Problem the Camera or the Display?
Sometimes the camera is fine and the screen is the weak link. A low-resolution display, dim screen, or wrong brightness setting can make a clean feed look soft and muddy.
A Simple Two-Part Test to Isolate the Issue
First, test the camera in daylight. If the daytime image is sharp but the night image is blurry, the issue is low-light performance or lighting — not the display. If the daytime image is also soft, the problem could be the lens, cable, or screen.
Second, test the display with another input. If you have a front camera or a dual-camera system, switch feeds. If every input looks blurry on the same screen, the display or its settings are the problem. If only one camera looks bad, that camera or its wiring is the suspect.
Display Brightness and Resolution Settings Worth Adjusting
Most displays have brightness, contrast, and night-mode settings. Set brightness to match your parking area, not the road ahead. Auto-dimming can make the camera feed darker than necessary when headlights are on.
Resolution is fixed by the hardware, so you cannot increase it in settings. But you can check whether the display is stretching a low-resolution signal across a large screen. A smaller, sharp image often looks better than a large, pixelated one.
How Auto-Exposure and Lighting Affect Night Image Quality<
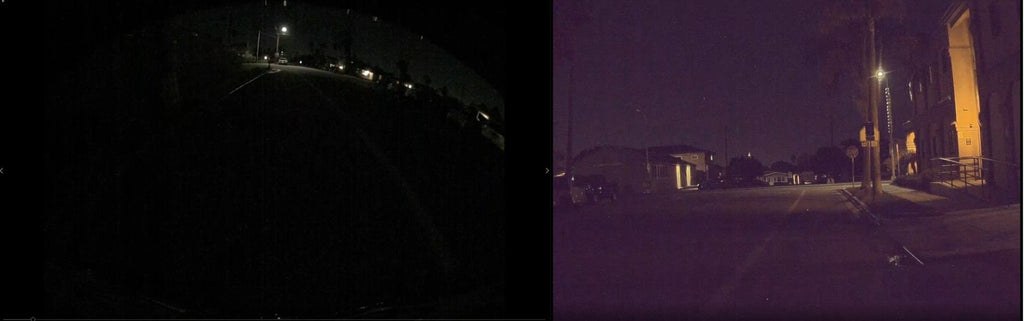
Low light and auto-exposure can make nighttime backup camera images appear blurry.
/h2>
Auto-exposure adjusts brightness automatically. In daylight it works well. At night, it struggles because the scene contains both very dark areas and very bright light sources.
Understanding Auto-Exposure and Working With Your Reverse Lights
When you shift into reverse, the camera relies on your reverse lamps. If those lamps are weak, the camera raises its gain, which amplifies noise and makes the image look grainy. If the lamps are too bright or aimed directly at the lens, the camera lowers exposure and the background disappears.
Some aftermarket cameras let you adjust exposure or switch modes. If yours does, try a lower gain setting and improve the lighting instead. If not, replace dim reverse bulbs, clean the lamp housings, or consider a dedicated reverse light kit.
Wiring and Electrical Issues That Cause Night Blur
Wiring problems are less common than dirt or exposure, but they produce distinct symptoms: flickering, rolling lines, dimming, or a fuzzy image that worsens when the engine runs.
Voltage Drops, Ground Loops, and Signal Interference
A voltage drop happens when the camera does not receive enough clean power, usually because the cable is too thin, a connection is corroded, or power is shared with another accessory. At night, when the charging system is under load, the camera may lose brightness and sharpness.
A ground loop occurs when the camera and display are grounded at different points, creating a small current through the video cable. This often shows as moving bars or distortion. Signal interference can come from power cables routed too close to the video cable. If the camera will not power on at all, the steps are different — see our guide on why a rear view camera stops working.
How to Check Connections Without a Multimeter
Start by inspecting visible connections near the camera and display. Look for corrosion, loose plugs, pinched wires, or a damaged video cable. Unplug and reconnect each connector once to reseat the contacts.
Next, check the ground wire. In many aftermarket installations, the ground attaches to bare metal with a ring terminal. If that point is rusty or painted, the connection is weak. Remove the screw, clean the metal, and reattach.
Finally, separate power and video cables if they are bundled together. A gap of a few inches can eliminate interference. If the image stabilizes, you have found the problem.
Upgrading Your Camera: Specs That Actually Fix Night Visibility
If cleaning, lighting, and wiring checks do not help, the camera itself may be too weak for night use. An upgrade is the most reliable fix, but only if you choose the right specifications.
Low-Lux Rating, Sensor Size, and WDR Explained
Low-lux rating tells you how little light the camera needs for a usable image. A lower number is better; a camera rated at 0.1 lux or lower can handle very dim conditions. Be cautious with marketing numbers, because manufacturers measure lux differently.
Sensor size matters more than megapixels. A larger sensor captures more light per pixel, reducing noise and improving night detail. A 1/2.7-inch sensor generally performs better than a smaller 1/4-inch sensor, even if both are labeled “HD.”
WDR (Wide Dynamic Range) helps the camera handle scenes with both bright and dark areas, such as a lit bumper against a dark street. Good WDR keeps detail in both zones instead of blowing out one side.
What to Look for in a 2026 Replacement Camera
In the current market, look for a camera that states its sensor size, low-lux rating, and WDR support rather than one that only promises “night vision.” Confirm the video standard matches your display — CVBS (composite) for most factory-style systems, or AHD for newer HD displays. A camera with the wrong output will not produce a picture at all.
Also consider field of view. A wider angle helps you see more, but it makes objects smaller and can increase edge blur. For most cars, a 120- to 170-degree diagonal view is reasonable. If you are comparing models, our guide to the best rear view camera options explains how to match specs to your vehicle and display.
Installation and Calibration for Better Night Performance
A good camera installed poorly will perform worse than a modest camera installed well. Mounting position, angle, and wiring all affect night image quality.
Mounting Position, Angle, and Field of View
Mount the camera as high as practical while keeping the bumper and part of the horizon in view. A camera mounted too low picks up glare from the ground and reverse lights. Angle it slightly downward so the bumper edge is visible; this gives a reference point and reduces bright sky, helping auto-exposure keep the ground visible. For position guidance, see our article on where to install a rear view camera.
Wiring Best Practices for Clean Power Delivery
Power the camera from a circuit that is active only in reverse, or use the reverse light circuit through a relay if the camera draws more current than the circuit can handle. Use a fused connection and verify polarity before connecting.
Keep the video cable away from power wires and high-current sources. Use shielded cable if your system supports it. Make connections with solder or quality crimp connectors and heat-shrink tubing to prevent corrosion. For a full walkthrough, see our step-by-step guide on how to install a rear view camera.
Maintenance, Weatherproofing, and Knowing When to Stop
Night blur is often a maintenance problem, not a hardware failure. A few seasonal checks can keep your camera clear for years.
Seasonal Checks That Prevent Night Blur
At the start of each season, clean the lens and inspect the housing for cracks or water intrusion. In winter, snow and road salt build up quickly; in summer, pollen and bugs are the main culprits. Check that any rubber seal or gasket is seated properly.
Also test the camera at night after any wash, wax, or detailing session. Wax residue on the lens is one of the most common causes of sudden night blur, and it is easy to miss in daylight.
Repair vs. Replace: Costs, Limitations, and When to Call a Pro
If the lens is dirty, cleaning is free. If a bulb is burned out, replacement is cheap. If the camera has internal moisture, a cracked lens, or a failing sensor, replacement is usually the better value — repairing a sealed camera unit is rarely cost-effective.
Costs vary widely by vehicle and system. A basic aftermarket camera can be an affordable fix, while a factory-style replacement for a newer vehicle may cost more, especially if it requires dealer programming. If you are not comfortable working with your vehicle’s electrical system, or if the camera is integrated with other safety systems, a professional installer is the safer choice.
Know when to stop: if you have checked the lens, lights, display, and connections and the image is still unusable, stop guessing. Consult the vehicle manual, contact the camera manufacturer, or ask a qualified installer to diagnose the system.
Final Verdict
Best for: Most drivers will fix a blurry backup camera at night by cleaning the lens, improving reverse lighting, and adjusting display settings before spending any money.
Think twice if: The lens is fogged from the inside, the housing is cracked, or the image stays blurry after all basic checks — those point to a hardware failure that cleaning cannot fix.
Next step: Run the five-minute cleaning and lighting test tonight. If that fails, compare replacement cameras using the low-lux, sensor-size, and WDR specifications covered above.
Frequently Asked Questions
If the lens is clean and the image is still blurry, the likely causes are weak reverse lighting, auto-exposure struggling with uneven light, or a small sensor that produces too much digital noise. Test the camera in daylight to see whether the problem is low-light performance or the display itself.
Yes, in many cases. Backup cameras rely on reverse lamps as their main light source after dark, so a dim or burned-out bulb forces the camera to raise its gain and produce a grainy image. Brighter bulbs, clean lamp housings, or a dedicated reverse light kit often restore sharpness.
Replace the camera if you see internal condensation, a cracked housing, or a milky haze that will not wipe off. If the image stays blurry after cleaning the lens, checking the lights, testing the display, and inspecting connections, the sensor or electronics are likely failing.
Federal rear-visibility rules apply to manufacturers of new vehicles, not to owners maintaining an older car. However, a blurry camera can contribute to a reversing collision, so treat it as a safety issue. State vehicle equipment rules vary, so check your local DMV if you are unsure.
WDR stands for Wide Dynamic Range. It helps the camera keep detail in both bright and dark areas of the same scene, such as a lit bumper against a dark street. A camera with good WDR will not blow out the bright zone or lose the shadows.
Many owners can, but it depends on your vehicle and your comfort with electrical work. You need to match the camera’s video output to your display, route cables away from airbags and moving parts, and connect power safely. If the camera is integrated with other safety systems, a professional installer is the safer choice.
Hi, I'm Ethan Carter, and I've spent over a decade testing automotive electronics, dash cams, and interior accessories. I created TopBestCar.com to help car owners cut through marketing hype and find gear that actually performs for their exact make and model — backed by hands-on testing, spec comparisons, and real owner feedback.
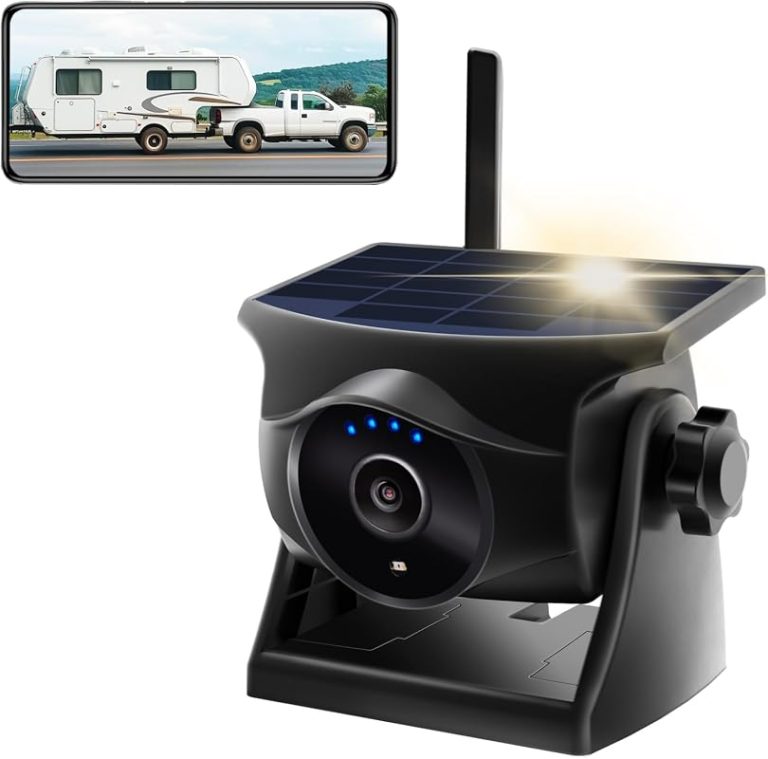
Compare best wireless reverse cameras for safety, compatibility, installation, useful features, and value. Read the guide to find the right choice for your car.