Water intrusion from high-pressure washing is the most common cause of a backup camera failing right after a car wash. Dry the camera and connectors, restart the system, and inspect for corrosion before replacing any parts.
Few things are more frustrating than a backup camera not working after car wash. The camera worked fine before you entered the wash bay, and now the screen shows static, a blue box, or nothing at all. In most cases, this is a moisture problem, not a dead camera. The fix usually starts with drying, inspecting, and re-seating the connections before you spend money on replacement parts.
Key Takeaways
Act fast: Moisture damage becomes permanent once corrosion sets in, so dry the camera and connectors.
Restart first: A simple infotainment reboot clears temporary glitches before you inspect anything.
Check the lens and harness: Fogging, droplets, and corroded pins point to water intrusion in the housing or wiring.
Use dielectric grease correctly: It protects clean, dry connectors but does not repair corrosion.
Know your limits: Factory cameras with dynamic guide lines may require dealer-level calibration after service.
Why a Car Wash Triggers Backup Camera Failure
Backup cameras live outside the sealed cabin. They are mounted near the license plate, tailgate handle, or bumper, where they face water, soap, road spray, and temperature swings. A car wash concentrates all of those stresses into a few minutes. High-pressure water can find gaps that normal rain never reaches, and soap changes the way water behaves on plastic and rubber surfaces.
How High-Pressure Water and Soap Bypass Seals
Factory cameras rely on rubber gaskets, O-rings, and adhesive bonds to keep moisture out. Those seals are designed for rain and road spray, not for a pressure washer nozzle held inches away. When a strong jet hits a seal, it can flex the rubber, lift an edge, or force water into a gap. Soap makes the problem worse by reducing surface tension, which lets water creep into tiny openings instead of beading up and rolling off.
Temperature adds to the risk. A hot camera hitting cold wash water, or a cold camera hitting warm water, creates a pressure difference inside the housing. That pressure change can pull moist air in through the same small gaps. Once water is inside, it does not always drain back out.
Moisture, Condensation, and Short-Circuit Behavior
Moisture inside a camera or connector does three kinds of damage. First, it can short the video signal to ground, which makes the display go dark or show static. Second, it can fog the inside of the lens, producing a blurry or milky image. Third, it can start corrosion on the circuit board and pins, and that damage is permanent even after the water dries.
This is why the failure often follows a pattern. The camera dies while it is wet, comes back after a few dry hours, and then fails for good once corrosion builds up. If you catch the problem early, you have a real chance to save the camera.
Immediate Steps to Take After the Camera Goes Dark
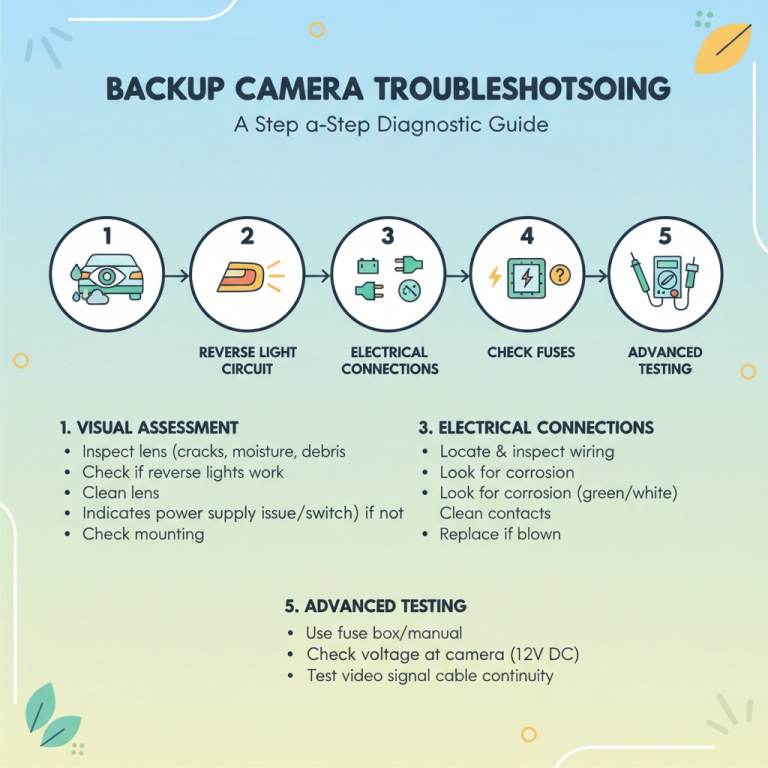
Check the camera lens and wiring for moisture after a wash.
Before you pull trim panels or buy a new camera, run through a few quick checks. Many car-wash failures are temporary, and some are not camera failures at all.
Restarting the Infotainment System Safely
An infotainment glitch can leave the reverse screen blank even when the camera is fine. Pull into a safe spot, shift into Park, and turn the vehicle off. Wait about a minute, then restart. Some systems also have a soft reset method described in the owner’s manual, such as holding the power button or selecting a reset option in the settings menu. If you need a refresher on the general process, our guide on how to reset the rear view camera covers the common approaches.
1
Restart the vehicle and system
Park safely, turn the engine off, wait 60 seconds, and restart. Test reverse again before doing anything else.
2
Inspect the lens and listen
Check for droplets, soap film, or fog on the lens. Listen for the camera’s activation sound if your vehicle has one.
3
Document the symptom
Note whether the screen is blank, blue, static, or showing a no-signal message. This tells you where to look next.
Visual and Audible Checks Before Diving Deeper
Look at the lens from outside the vehicle. Water droplets on the glass can make the image look distorted or dark. Soap film can leave a haze that wipes off with a microfiber cloth. If the lens is clean and the image is still missing, the problem is likely inside the housing, in the wiring, or in the display system.
Also check whether the camera activates at all. Some vehicles emit a soft click or whir when reverse is engaged. If you hear nothing and the screen shows no signal, the camera may not be receiving power.
Inspecting the Camera Lens and Housing for Water Intrusion
If a restart does not help, the next step is to look closely at the camera itself. Water intrusion is the most likely cause, and the evidence is usually visible if you know where to look.
Where Water Collects in Factory and Aftermarket Mounts
Factory cameras are usually integrated into the license plate bezel, tailgate handle, or a dedicated trim pocket. Water runs down the liftgate glass and pools around the camera before draining through small weep holes. If those weep holes are blocked with dirt, water sits against the seal longer. Aftermarket cameras are often bolted to the bumper, license plate bracket, or a drilled hole in the tailgate. On those mounts, the cable entry point is the most common leak path, especially if the installer did not add a grommet or sealant. Understanding the differences between mount styles can help, and our guide on where to install rear view camera explains the trade-offs for common mounting locations.
Recognizing Fogging, Droplets, and Internal Condensation
Fog on the inside of the lens that clears after a few minutes is usually surface condensation and may resolve on its own. Droplets that stay in the same spot, or a milky haze that never clears, mean water is trapped inside the sealed housing. If you can see water pooled at the bottom of the lens, the seal has failed and the camera will need to be opened, dried, and resealed, or replaced.
Checking the Wiring, Connectors, and Harness<
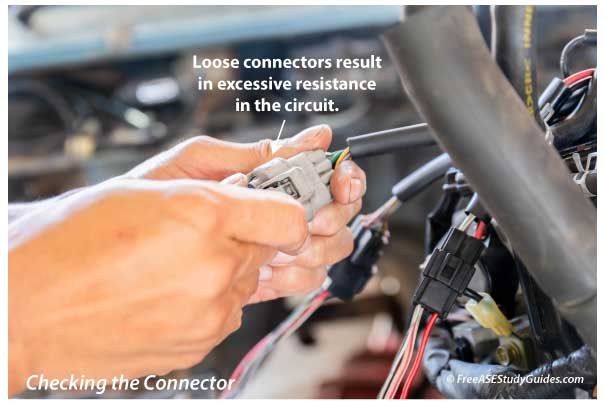
Inspect the camera harness for water intrusion after a car wash.
/h2>
Water can reach the camera’s electrical connections even when the lens looks fine. The harness that carries power and video is the other half of the system, and it is just as exposed to wash water.
Locating the Camera Harness and Common Corrosion Points
The camera harness runs from the camera into the tailgate, through a rubber boot between the tailgate and body, and then along the roof or floor to the head unit. The rubber boot is a natural water channel, and the connectors near the bumper, in the spare tire well, or behind interior trim are the most common corrosion points. Green or white crust on the pins, water inside a connector shell, and bent or pushed-out pins are all signs that moisture has been at work.
Signs of a Pinched, Chafed, or Disconnected Cable
Open and close the tailgate slowly while watching the harness. A cable that is pinched, stretched, or chafed can lose contact only when the tailgate moves. Look for cracked insulation, exposed copper, and wires that rub against sharp body panels. A disconnected or partially seated connector is the easiest problem to fix, but it can also be the easiest to miss.
Evaluating the Display Screen vs. the Camera Signal
Before you replace anything, confirm which side of the system is failing. A backup camera system has two halves: the camera that captures the image and the display that shows it.
How to Tell If the Problem Is the Display or the Camera
If the display still shows the home screen, radio, or navigation clearly, the screen itself is working. If the reverse screen is blank, blue, or full of static, the camera or its signal path is the problem. A quick way to understand the signal flow is to review how a typical rear view camera works, including how the camera sends video to the display when reverse is engaged.
Understanding Blue Screens, Static, and No-Signal Messages
A blue screen usually means the display is powered but receiving no video signal. Static suggests a weak signal or interference, which can happen when water creates a high-resistance path in the cable. A “camera unavailable” or “no signal” message from the vehicle’s software points to a communication fault, which may be in the camera, the wiring, or the head unit. Each symptom narrows the list of likely causes.
Drying, Re-seating, and Corrosion Treatment
Once you have found moisture in the camera, the housing, or a connector, the goal is to dry everything completely before powering the system again. Reconnecting wet parts can turn a temporary problem into a permanent one.
Safe Drying Methods for the Lens and Connectors
Wipe the lens with a clean microfiber cloth. For connectors, unplug them and let them air-dry in a warm, dry area. Compressed air can help clear water from connector shells, but hold the can upright and use short bursts. Do not use a heat gun or hair dryer on high heat; plastic housings and seals can warp. If the camera housing has trapped water, it must be opened and dried before resealing, which is a job for someone comfortable with delicate electronics.
When Dielectric Grease Helps and When It Doesn’t
Dielectric grease is a protective coating, not a repair compound. It seals out moisture and prevents corrosion on clean, dry connectors. It does not conduct electricity, and it does not fix corrosion that is already there. If you apply grease over wet or corroded pins, you can trap moisture and make the problem worse. Clean the pins with electrical contact cleaner, dry them completely, and only then apply a thin coat of dielectric grease before reconnecting.
Do
Dry connectors completely before reconnecting them
Clean corrosion with electrical contact cleaner
Apply dielectric grease thinly after cleaning
Don’t
Reconnect wet or corroded connectors
Use a heat gun on plastic housings or seals
Spray contact cleaner into a connected camera
Calibration and Alignment After Reassembly
If you removed the camera to dry it, or if you replaced it, the image may not point where it should. Reassembly is not finished until the camera sees the correct area behind the vehicle.
Restoring the Correct Field of View and Guide Lines
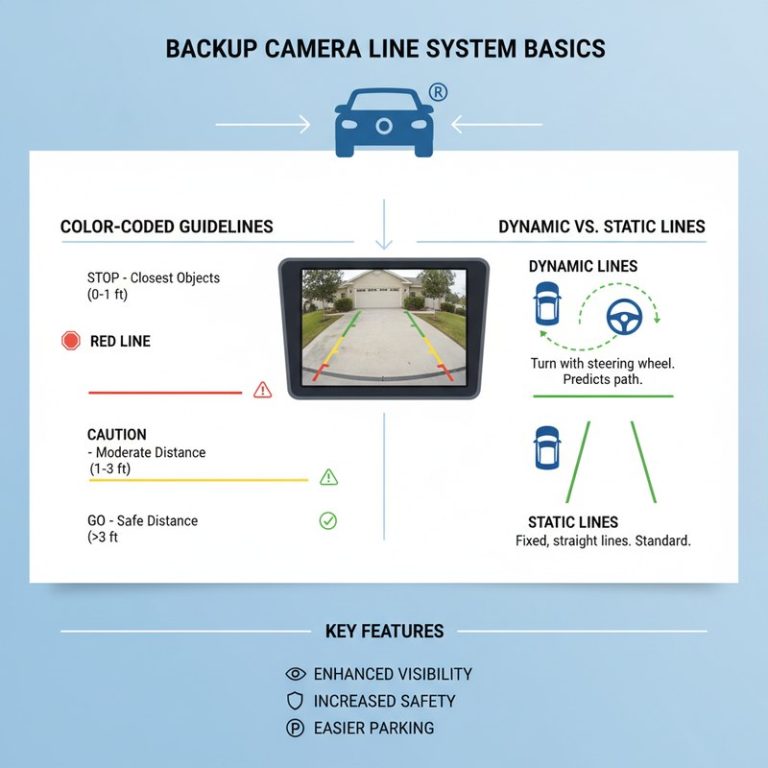
Aftermarket cameras usually have a bracket that can be angled up or down. Adjust it so the view shows the bumper edge and enough of the area behind the vehicle. If the image is rotated or tilted, the camera may have been reinstalled upside down or the bracket may be bent. Fixed guide lines are built into the camera or the display and do not need adjustment, but dynamic lines that move with the steering wheel are a different matter.
Why Some Vehicles Require Dealer-Level Calibration
Many factory systems use dynamic guide lines tied to the steering angle sensor. If the camera module was replaced or the tailgate wiring was disturbed, the system may need a calibration procedure performed with a factory scan tool. This is not something you can complete with a simple reset. Check the owner’s manual or ask the dealer service department whether your vehicle requires calibration after camera service.
When the Problem Persists: Electrical Diagnostics and Limits
If the camera is dry, the connectors are clean, and the display works, but the image still will not appear, the fault may be electrical. This is where DIY diagnosis has clear limits.
Checking Fuses and Voltage Without Causing More Damage
The owner’s manual will identify the fuse for the camera or infotainment system. A blown fuse can be checked with a test light or multimeter, but only after the system is dry. Never probe wires while the harness is wet, and never use a fuse tap or jumper wire to bypass a fault. If you are not comfortable reading a wiring diagram, stop at the fuse check.
Knowing When to Stop and Call a Professional
If the camera still fails after drying, cleaning connectors, checking fuses, and confirming power at the camera, the camera module or the head unit may need replacement. Repeated water intrusion can damage the video interface even if the camera looks fine. A qualified installer or dealer can test the signal with a scan tool and a wiring diagram, which is faster and safer than guessing with replacement parts.
Preventing Future Failures: Washes, Sealants, and Routine Checks
The best fix for a car-wash camera failure is to keep water out in the first place. A few habits can reduce the risk without changing how you wash the car.
Choosing Car Wash Methods That Reduce Water Intrusion Risk
Touchless washes and hand washing with a gentler spray put less stress on camera seals than a high-pressure wand aimed directly at the lens. If you use a self-serve wash, do not point the wand at the camera, the tailgate handle, or the license plate area. Wiping the camera lens after a wash removes soap film before it dries into a haze. For more background on the broader causes of camera failure, our guide on why the rear view camera is not working covers the common culprits beyond water intrusion.
Budgeting for Replacement vs. Repair and Long-Term Maintenance
If the camera cannot be saved, replacement cost varies widely by vehicle. Factory cameras are often more expensive and may require dealer programming, while aftermarket cameras cost less but vary in sealing quality. A repair that only dries and reseals the housing is cheaper when caught early. Budget for the possibility of replacement, and factor in labor if you are not comfortable doing the work yourself.
Final Verdict
Best for: Drivers who caught the failure quickly and want to save the original camera with drying, cleaning, and connector maintenance.
Think twice if: The camera shows visible corrosion, pooled water inside the housing, or a cracked seal, because replacement is usually more reliable than a repair.
Next step: Restart the system, inspect the lens and connectors, and dry everything fully before testing again or spending money on parts.
Frequently Asked Questions
Yes. High-pressure water, soap, and temperature changes can push moisture past the camera’s seals and into connectors or the lens housing. The failure may be temporary while the camera is wet or permanent if corrosion develops.
Surface moisture usually clears within a few hours of dry, warm conditions. Internal condensation can take a day or more. If the image has not improved after a full day, the moisture may have already caused corrosion.
You can drive, but you lose the rear visibility aid that helps detect children, pets, and objects behind the vehicle. Use your mirrors and do a walk-around until the camera is restored.
Only after cleaning and fully drying the connector. Dielectric grease protects clean connections from future moisture but does not fix corrosion and does not conduct electricity.
Costs vary widely by vehicle and camera type. Factory replacement parts and dealer labor are typically more expensive, while aftermarket cameras are usually less costly but vary in sealing quality.
Touchless washes reduce the risk because they use less direct pressure on the camera area, but no wash method guarantees a dry camera. Inspecting seals and avoiding direct spray at the lens is the best prevention.
Hi, I'm Ethan Carter, and I've spent over a decade testing automotive electronics, dash cams, and interior accessories. I created TopBestCar.com to help car owners cut through marketing hype and find gear that actually performs for their exact make and model — backed by hands-on testing, spec comparisons, and real owner feedback.