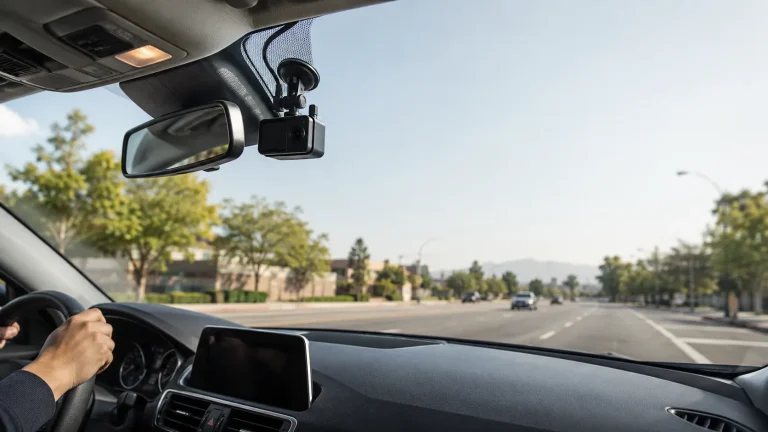
Cost of Dash Cam Installation: What You’ll Pay in the US

The cost of dash cam installation in the US is often about $99.99 for a front-only camera and $149.99 for a front-and-rear system at a major national retailer. Your final bill may be higher when you add hardwiring, a battery pack, special parts, difficult trim, or complex rear-cable routing.
Budget around $100 for basic professional front-camera labor and around $150 for front-and-rear labor as a current starting benchmark. Get a written quote before booking. The cheapest option is a plug-in DIY setup, while hidden wiring, parking mode, battery packs, and complex vehicles can raise the total.
Installation cost is not only about attaching a camera to glass. A proper job may include choosing a safe position, hiding the cable, finding suitable power, protecting the vehicle battery, routing around airbags, setting the camera, and testing saved footage.
In my view, the best quote is the one that clearly lists labor, parts, power method, camera channels, and warranty. A low headline price can become expensive when key items are added later.
Current Dash Cam Installation Cost
Checked July 27, 2026, Best Buy lists dash camera installation without a rear camera at $99.99. It lists front-and-rear dash camera installation at $149.99. These prices provide a useful national-chain labor benchmark, but local availability and final requirements can vary.
Review the current Best Buy car-electronics installation prices before booking. Confirm whether your camera, hardwire kit, fuse adapters, tax, and special vehicle work are separate.
Prices can change. Treat these figures as a starting point, not a guaranteed quote for every vehicle or location.
What Changes the Installation Price?
The camera system and the vehicle decide how much work is needed. A single front camera is usually simpler than a three-channel setup with parking mode.
| Cost Factor | Why It Matters | Likely Effect |
|---|---|---|
| Front-only camera | Shorter cable route | Lower labor |
| Rear camera | Long cable routing | Higher labor |
| Hardwiring | Fuse and ground access | Parts and labor |
| Parking battery | Extra mounting and wiring | Higher total |
| Complex trim | Slower safe removal | Custom quote |
| Liftgate or truck | Moving cable path | More labor |
Number of Cameras
A front-only camera needs one mount and one main cable route. A rear camera adds a long video or power cable through the cabin.
Hatchbacks and SUVs can take more work because the rear cable may pass through flexible boots into a moving liftgate. A cabin camera may be simple when it connects directly to the front unit, but that depends on the system.
Plug-In, OBD, or Hardwired Power
A plug-in camera uses a 12-volt outlet or approved USB power source. This is often the lowest-cost method because it avoids fuse-box work.
An onboard diagnostics port, called OBD-II, can offer a cleaner power option on compatible vehicles. Hardwiring connects through the vehicle fuse area and can support a hidden cable route or parking mode.
BlackboxMyCar estimates about five minutes for a plug-in setup, about 20 minutes for an OBD installation, around 1.5 hours for hardwiring, and around two hours for a battery-pack installation. These are general examples, not promises for every vehicle. See its dash cam installation-method guide.
Parking Mode and Battery Protection
Parking mode records after the engine is off. It often needs a hardwire kit, an OBD power cable, or a dedicated dashcam battery.
The installer may need to set voltage cutoff, timer, or parking-mode options. This adds work and may require extra hardware.
Nextbase says its US professional-installation service includes a hardwire kit with a stated MSRP of $29.99 when purchased through that service. It also notes that installation time depends on the vehicle and product location. Review the Nextbase professional-installation details.
Vehicle Design
Some vehicles have easy fuse access and simple trim. Others have tight panels, several airbags, advanced driver-assistance system sensors, or unusual rear doors.
Luxury vehicles, electric vehicles, hybrids, commercial vans, trucks, and vehicles with fragile trim may need more planning. The installer may charge by the job instead of using a fixed price.
Check: Confirm the vehicle year, make, model, fuse type, power voltage, windshield sensors, airbag locations, rear-door design, and camera channels. Limitations: A standard advertised installation price may not cover specialty vehicles, damaged trim, nonstandard wiring, or customer-supplied parts.
What Should the Quote Include?
A professional quote should explain exactly what the installer will do. Ask for written answers before the appointment.
- Front, rear, and cabin camera mounting
- Plug-in, OBD, or hardwired power
- Hardwire kit and fuse adapters
- Full cable concealment
- Safe routing around airbags
- Parking-mode configuration
- Battery-pack installation
- Camera app and basic settings
- Daytime recording test
- Labor and parts warranty
- Tax and possible extra charges
Ask whether the installer will work with a camera bought elsewhere. Some services only install supported brands, new products, or items bought from approved retailers.
Professional Installation Steps
The exact process varies, but a careful installation usually follows this order.
The installer checks the windshield, sensors, airbags, trim, fuse area, and rear-cable path.
The mount stays outside the driver’s main road view and clear of factory sensors.
The installer chooses plug-in, OBD, switched fuse, constant fuse, or battery-pack power.
Cables are hidden without crossing airbags, pedals, controls, or moving parts.
Date, time, video quality, audio, parking mode, and battery settings are checked.
The installer confirms that each camera records and that the files open correctly.
Moderate: A simple front camera can be easy. Hardwiring and rear-camera routing require trim work, power checks, safe cable placement, and vehicle-specific judgment.
Safety Can Be Worth the Labor Cost
Professional installation is not only about hiding wires. It can reduce mistakes around airbags, pedals, steering parts, and factory cameras.
NHTSA explains that airbags deploy very quickly. Dashcam cables and equipment should stay clear of identified deployment areas. Review the official NHTSA airbag guidance and your vehicle manual before moving trim.
Our safety gear guide covers more equipment that should be installed or stored without limiting driver movement.
DIY vs Professional Installation
DIY can save labor cost when the setup is simple. Professional work makes more sense when the installation crosses trim, airbags, fuse boxes, or a rear liftgate.
| Option | Best For | Main Trade-Off |
|---|---|---|
| DIY plug-in | Simple front camera | Visible cable |
| DIY OBD | Compatible easy setup | Port stays occupied |
| Professional front | Clean hidden wiring | Labor cost |
| Professional dual | Front-and-rear coverage | Higher labor |
| Professional hardwire | Parking mode | Parts and setup |
| Battery-pack install | Extended parking use | Highest complexity |
- Get an itemized written quote.
- Confirm all camera channels.
- Ask about parts and warranty.
- Check parking-mode protection.
- Test footage before leaving.
- Assume accessories are included.
- Choose labor by price alone.
- Route wires across airbags.
- Use an unknown fuse.
- Pay before checking operation.
Ways to Lower the Total Cost
You can reduce the bill without choosing unsafe work.
- Buy a camera with the correct hardwire kit.
- Choose front-only coverage when rear video is not needed.
- Use plug-in power when parking mode is not important.
- Bring the exact vehicle and camera details when requesting quotes.
- Ask whether installation is discounted with camera purchase.
- Avoid paying twice by confirming compatibility first.
- Compare the same scope across two or three installers.
Do not remove safety work only to save money. Hidden cable routing around airbags and moving parts requires care.
For compatible trim and electrical tools, see our tools and garage gear. For more camera-buying information, visit our car electronics guide.
When Professional Installation Is Worth It
Professional installation is usually worth considering when:
- You want front-and-rear recording.
- You need parking mode.
- The camera needs hardwiring.
- The vehicle has windshield sensors.
- The cable must pass an A-pillar.
- The rear cable enters a moving liftgate.
- You drive an EV, hybrid, luxury vehicle, truck, or commercial van.
- You want a labor warranty.
- You are unsure which fuse or ground to use.
A basic plug-in front camera may not justify a full professional installation when you can mount it safely and keep the cable secure.
- Best for: Owners who want hidden wiring, parking mode, rear-camera coverage, and safer vehicle-specific routing.
- Think twice if: You only need a simple plug-in front camera and can route it safely yourself.
- Next step: Get an itemized quote that lists labor, parts, power method, camera channels, testing, and warranty.
Frequently Asked Questions
A current national-chain benchmark is about $99.99 for front-only installation labor. Your final price can change with the vehicle, power method, parts, and local availability. Ask whether the quote includes hardwiring, fuse taps, cable concealment, setup, and testing.
A current Best Buy benchmark is $149.99 for front-and-rear installation labor. More complex hatchbacks, trucks, luxury vehicles, or systems with battery packs may need a custom quote. Confirm whether rear-cable routing and all required parts are included.
Usually, installation pricing refers to labor rather than the dash cam itself. Some packages may include a hardwire kit or selected accessories. Read the service description and ask for an itemized quote covering the camera, parts, labor, taxes, and any return visit.
It can be. Hardwiring requires access to a suitable fuse, a safe ground, hidden cable routing, and battery-protection settings. The labor may cost more than a simple plug-in setup, and the hardwire kit or fuse adapters may be charged separately.
Yes, a basic plug-in front camera may have no labor cost if you install it yourself. You may still need a memory card, clips, cleaning supplies, or a power accessory. Stop and use a professional if the cable route crosses an airbag area.
Time varies by vehicle and system. A front-only plug-in setup can be quick, while hardwiring, rear-camera routing, or a battery pack takes longer. Ask the installer for a vehicle-specific estimate and allow time for camera setup and footage testing.
It is often worth it when you want hidden wiring, parking mode, a rear camera, or help around airbags and factory sensors. DIY may be reasonable for a simple plug-in camera when you can mount it legally and route the cable safely.
Conclusion
The cost of dash cam installation often starts near $99.99 for front-only professional labor and $149.99 for front-and-rear labor at a major national retailer. Complex vehicles, hardwiring, parking batteries, and specialty parts can raise the final total.
For owners, the main value is a clean setup with tested power and fewer installation mistakes. For drivers, safe placement and cable routing help protect visibility and movement.
Ask for a written, itemized quote before booking. Confirm compatibility, battery protection, airbag-safe routing, final footage testing, and the labor warranty.