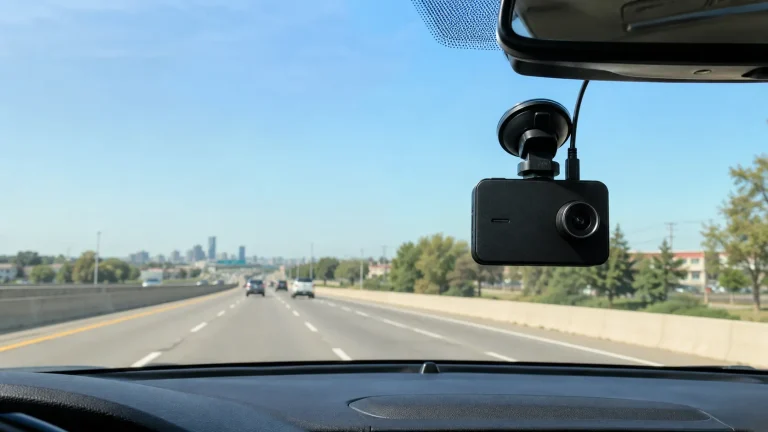
Are Dual Dash Cams Easy to Install? A Complete Guide

Dual dash cams look more complex than single-camera models, but you can install many of them without professional help. You can usually complete a plug-in installation in about an hour if you can route cables neatly and follow the instructions.
The front camera needs a secure view of the road, while the rear camera requires extra cable routing through the cabin. I’ll explain the tools, wiring choices, camera placement, testing steps, and when hardwiring or parking mode may need professional help.
Key Takeaways
- Plug-in setups offer the simplest installation.
- Rear-camera wiring takes the most time.
- Testing and cable checks help ensure reliable recording.
What Determines Installation Difficulty
I find that installation difficulty depends mainly on the vehicle’s interior design and the dash cam’s wiring system. Tight trim panels, limited cable space, rear hatch layouts, and hardwiring requirements can turn a simple setup into a longer task.
Vehicle Type And Interior Layout
I check the vehicle’s roofline, trim panels, airbags, and rear-camera path before installing anything. A sedan usually offers a direct route along the headliner and rear window. An SUV, hatchback, or wagon may require more cable because the rear camera connects across a moving hatch.
The A-pillar often hides wiring, but I keep cables away from curtain airbags. I route the cable behind the trim or along the factory wiring path without placing it across the airbag. Door seals and headliner gaps can help hide wires, but I avoid forcing panels that resist removal.
Rear window tint, defroster lines, wipers, and liftgate hinges also affect camera placement. I mount the camera where it has a clear view and does not block the driver’s sightline. If the vehicle has a complex interior or removable panels, I may choose professional installation.
Camera System Design And Features
I find that a plug-in dual camera is easier to install than a hardwired system. A front camera usually connects to the 12-volt accessory socket, while the rear camera uses a long video cable routed through the cabin. This setup needs basic cable management but no fuse-box work.
Features can also change the difficulty:
- Parking mode: Often requires a hardwire kit and correct fuse selection.
- USB or app setup: Makes testing and configuration easier.
- Adhesive mounts: Install quickly but need a clean, dry surface.
- Suction mounts: Allow repositioning but may loosen in heat.
- Long rear cables: Help reach the camera but require careful routing.
- Removable memory cards: Simplify recording checks and updates.
I test both cameras before hiding the cables. This prevents removing trim if the rear connection or power supply does not work.
Tools, Parts, And Preparation
I can install most dual dash cams with a few basic tools, the correct power method, and a clear cable plan. I first check the camera instructions, vehicle trim, airbag locations, and available power connections before removing any panels.
Essential Installation Tools
I use these tools and parts for a clean installation:
- Interior trim pry tool: Helps loosen plastic panels without scratching them.
- Microfiber cloth: Cleans the glass and protects the dashboard.
- Rubbing alcohol: Removes oil before I attach adhesive mounts.
- Cable clips or fabric tape: Keeps wires secure and prevents rattles.
- 12V power adapter: Provides simple plug-in power.
- Hardwire kit: Connects the camera to the fuse box and may support parking mode.
- Fuse tap and spare fuse: Matches the vehicle’s fuse type when hardwiring.
- Plastic zip ties: Bundles excess cable safely.
- Test light or multimeter: Helps me identify constant and switched power.
I avoid metal tools near trim, wiring, and airbags. I also confirm that the camera uses the correct voltage and that the memory card meets the manufacturer’s requirements.
Choosing Cable Routes Before Starting
I place the front camera behind or beside the rearview mirror without blocking the driver’s view. I clean the glass, check the camera’s viewing angle, and leave enough cable to reach the headliner.
I route the rear-camera cable along the top edge of the windshield, then under the headliner and along the vehicle’s side trim. I keep the cable away from moving parts, sharp edges, and curtain airbags. I never force a wire behind an airbag cover or across its deployment path.
At the rear, I route the cable through the hatch or trunk wiring area using the vehicle’s existing rubber conduit when possible. I leave a small service loop near the hinge so the cable does not stretch when the hatch opens. Before replacing trim, I test both cameras and check that no cable pinches or interferes with seals.
Front Camera Setup
I place the front camera where it has a clear view without blocking my vision. I also choose a power connection that stays secure, protects the vehicle’s electrical system, and leaves enough cable for the rear camera.
Selecting A Windshield Position
I mount the camera near the top center of the windshield, usually behind or beside the rearview mirror. This position keeps the camera less visible and gives it a balanced view of the road. I check that the camera does not block sensors, safety systems, stickers, or my view.
Before attaching the mount, I clean the glass with a dry, lint-free cloth and test the camera’s viewing angle. I make sure the hood takes up only a small part of the image and that the horizon stays level. I also confirm that the screen and buttons remain reachable if I need to adjust settings.
For an adhesive mount, I press it firmly against clean, dry glass and let it set according to the manufacturer’s instructions. I route the rear-camera cable along the headliner and trim, avoiding areas that contain airbags.
Connecting Power Safely
I connect the front camera to a 12-volt accessory socket for the simplest installation. This method usually powers the camera when the vehicle starts and turns it off when the vehicle shuts down. I leave enough slack near the camera and secure the remaining cable under the headliner and door trim.
For parking mode, I use a compatible hardwire kit with low-voltage protection. I connect it only to the fuse locations identified by the vehicle and kit instructions. The protection feature helps prevent the camera from draining the starter battery, but I still verify that the camera powers down correctly.
I keep cables away from pedals, steering parts, sharp edges, and curtain airbags. After connecting power, I test recording, time settings, memory-card errors, and the rear-camera connection before replacing all trim.
Rear Camera Placement And Wiring
I place the rear camera high on the rear windshield, near the center, so it captures the road without blocking the driver’s view. I route the cable along the headliner and trim, while keeping it clear of airbags, hinges, and other moving parts.
Routing Cables Through The Cabin
I clean the glass before attaching the camera. I mount it inside the rear windshield, usually near the top center, and leave enough cable slack for the hatch or trunk to open fully. On an SUV or hatchback, I guide the cable through the rubber wiring boot between the body and liftgate when the design allows it.
I use a plastic trim tool to lift trim gently. I tuck the cable under the headliner, then route it along the roof edge toward the front pillar. I avoid sharp bends and pinch points. I connect the cable to the front camera, then test the video signal before replacing the trim.
For a cleaner installation, I secure loose sections with small clips or fabric tape. I keep the cable away from the driver’s direct view and check that the hatch, trunk, and doors close without pulling on it.
Avoiding Airbags And Moving Components
I do not place the cable across an A-pillar airbag cover. If the vehicle has side-curtain airbags, I route the cable behind the airbag or along the door seal, following the vehicle’s trim path. I never push a wire across the front of an airbag module.
I keep the cable away from seat-belt mechanisms, window tracks, sunroof parts, pedals, and steering components. These parts can pull, cut, or trap the cable. I also avoid routing wires near hot surfaces, such as exposed heaters or engine-bay components.
Before finishing, I check that trim panels sit flat and that no cable hangs near the driver’s feet. I test the rear camera while opening the hatch, adjusting the seats, and driving over a short route.
Hardwiring And Parking Mode Options
I can power a dual dash cam through a fuse tap or use a separate battery pack for parking mode. I choose the method based on the car, the camera’s power needs, and how long I want recording to continue after I park.
Using A Fuse Tap
I connect a hardwire kit to the fuse box, usually with one wire for constant power and another for switched power. The constant-power wire lets the camera enter parking mode after I turn off the car. The switched wire tells the camera when the engine is running. I connect the ground wire to a clean metal bolt.
I check my owner’s manual before choosing a fuse. I avoid circuits linked to airbags, braking systems, engine controls, or other safety equipment. I also confirm the fuse-tap type and install the original fuse in the correct position.
A quality kit should include low-voltage protection. This feature cuts power when the vehicle battery reaches a set limit. I route the rear-camera cable behind trim panels, keeping it clear of side-curtain airbags. A fuse-tap installation gives me a tidy setup without using the 12-volt outlet.
When Professional Installation Makes Sense
I consider professional installation when the fuse box is hard to reach, the vehicle has complex electronics, or I need to route a cable through a hatch or powered tailgate. Dual cameras often require a long rear cable, and forcing it behind trim can damage clips or place the wire near an airbag.
An installer can identify a suitable fuse, test the circuit, set the voltage cutoff, and hide both power and rear-camera cables. I also choose professional help when the vehicle is leased, under warranty, or equipped with sensitive driver-assistance systems.
A separate dash-cam battery pack may suit me better if I want parking mode without drawing from the vehicle’s starter battery. It needs its own charging connection and enough capacity for the camera’s expected recording time.
Testing, Adjustment, And Ongoing Maintenance
I test both cameras before relying on the system and adjust their angles for a clear view. I also inspect the lenses, memory card, power connection, and rear-camera cable at regular intervals.
Checking Video Coverage
I turn on the ignition and confirm that both cameras start recording. I check the display or recorded files to make sure the front and rear views appear without gaps, flickering, or error messages.
I adjust the front camera so it shows the road ahead while keeping the dashboard to a minimum. The horizon should sit near the middle of the image. I aim the rear camera through the back window, checking that the view covers nearby traffic without pointing too far at the sky, seats, or trunk lid.
I drive or review sample footage in daylight and at night. I look for glare, blocked areas, blurry images, and readable details such as lane markings. I also test the microphone, date, time, loop recording, and parking mode if I use those features. I format the memory card in the camera when required and replace it if recording errors continue.
Maintaining Lenses And Connections
I clean each lens with a soft, dry microfiber cloth. If dirt sticks to the glass, I lightly dampen the cloth rather than spraying cleaner onto the camera. I also clean the windshield area in front of each lens because dust, fingerprints, and film can reduce image quality.
I check the mounts after driving on rough roads. A loose mount can change the camera angle or cause vibration in the footage. I press cable clips back into place and make sure the rear-camera cable does not interfere with airbags, pedals, steering parts, or door seals.
I inspect the power plug and connectors for looseness or damage. If the camera restarts or stops recording, I test the power source, cable, and memory card separately. For a hardwired system, I have a qualified installer check the fuse connection instead of pulling trim or changing vehicle wiring without the proper tools.
Frequently asked questions
Are dual dash cams easy to install?
I find most dual dash cams manageable for DIY installation. The front camera usually mounts with adhesive, while the rear camera connects to it with a long cable.
How do I power the cameras?
I can use the vehicle’s 12V socket for the simplest setup. A hardwire kit connects the camera to the fuse box and may support parking mode, but I recommend professional help if I am unfamiliar with vehicle wiring.
Where should I mount the front camera?
I place it behind the rearview mirror, where it has a clear view and does not block my sight. I clean and dry the glass before attaching the mount.
How do I route the rear-camera cable?
I run the cable along the headliner and door trim, then secure it beneath trim panels. I avoid areas near airbags and moving parts, and I never force the trim loose.
Will installation damage my car?
A plug-in installation normally does not damage the vehicle. I take extra care with trim, adhesive mounts, and wiring to avoid marks or interference with safety equipment.
Do I need special tools?
I usually need only a trim tool, a clean cloth, and cable clips. A fuse tap and test light may help with hardwiring.
Conclusion
I find dual dash cams reasonably easy to install for most drivers. The front camera usually mounts near the rearview mirror, while the rear camera connects with a longer cable routed along the roof liner and side trim.
A plug-in setup can take about an hour and does not require changes to the vehicle’s wiring. I would use cable clips or tuck the cable beneath trim, while keeping it clear of airbags, pedals, and the driver’s view.
Installation choice:
- Cigarette-lighter power: Fastest and simplest option
- USB power: Useful when the camera supports it
- Hardwire kit: Cleaner installation and possible parking mode, but it needs more care
I would check the camera’s position, test both views, and format the memory card before driving. I would also confirm that the mount does not block visibility and that local laws allow the chosen placement.
For drivers who want fewer installation steps, a model with a long rear-camera cable, clear instructions, and plug-in power offers the easiest path.